GUI Tables
Columns
Adding, Editing, Copying, & Deleting Columns
Adding
(Note: these options are only available when in developer mode)
There are three ways to add columns in tables
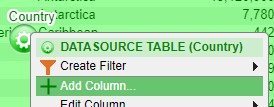
1. The first way to add a column is to through the panel configuration menu. Click on the green button to bring up the menu and select Add Column
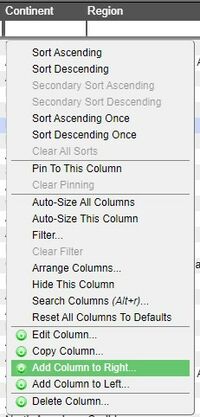
2. The second way to add columns is to click on a column to bring up the column menu. This method allows you to place the new column in between existing columns. In the menu, select whether to add the new column to the right or left of the selected column
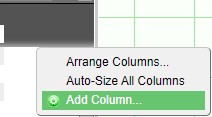
3. The third way to add columns is to click on an open area of the header in order to bring up the header menu. In the menu, select Add Column.
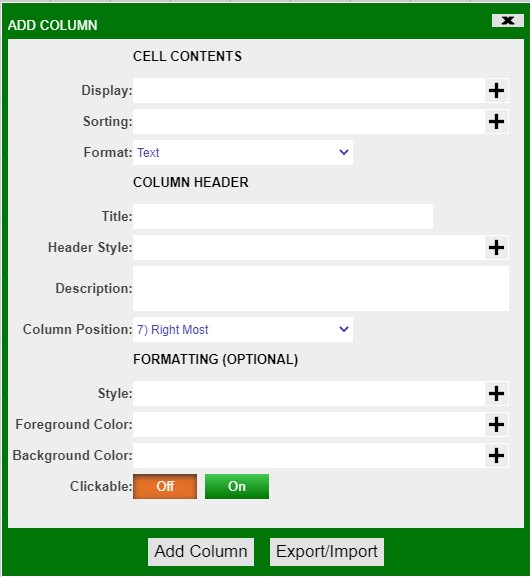
Add Column menu
| Display | Use variables, operators, functions, and icons to create the content for the column |
| Sorting | Use variables, operators, and functions to apply a sorting to the contents of the column |
| Format | Choose the format of the column (e.g.: text, numeric, time, date, price, etc.) |
| Title | Create a title for the new column. Must be unique from existing columns. |
| Header Style | Apply different fonts, alignments, style, and colors to the column header |
| Description | Add a description/help which can be seen when clicking on the column header |
| Column Position | Drop down list of various positions where the new column can be placed (can also be hidden) |
| Style | Apply a style to the contents of the column (including font and alignment) |
| Foreground Color | Apply a color to the contents of the column |
| Background Color | Apply a background color to the column |
| Clickable | Makes the contents of the column clickable |
Example - adjusting header and column styles
Column Description
Conditional Formatting


